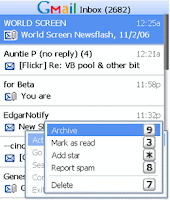
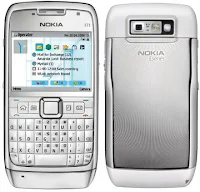
 I have configured and been using my hotmail, clear.net.nz pop mail, vodafone sync mail and Gmail on my Nokia E71. They all work perfectly either via my Vdoafone 3G GPRS or WiFi at home/work. This had improve my respond time to my business associate's emails based at different world location. With the help of portable web mail, I can conduct my online business with ease!
Here are the steps you take for setting up Gmail on your Nokia E71 using the built in messaging application. I find this solution to be very good, except that it doesn't download the full emails automatically, only the headers. It's not really a huge problem as it only takes 2-3 seconds to retrieve the email.
Reminder (thanks to Rita): With the E71 you don't need to do all these settings to set up Gmail imap, the E71 will find all them for you when you enter your username and password. But if your having problems like I was when outgoing messages or anything else you can go into your settings for that email account and make sure they all look like what you see below. Make sure your security ports are set right. Steps for setting up Gmail, straight from Google:
To configure IMAP for your Symbian S60 device, just follow these steps:
 1. Enable IMAP in your Gmail settings.
 2. Select 'Messaging' > 'Options' > 'Settings' > 'E-mail' > 'Mailboxes.'
3. If you have never set up email on your phone before, select 'Yes' to define a new mailbox. If you already have other mailboxes, select 'Options' and then 'New mailbox.'
4. Select 'Start' to begin the setup wizard.
5. Select 'IMAP4' and then 'Next.'
6. Enter your full email address (including '@gmail.com') as the email address and select 'Next.' Google Apps users, enter your full address in the format 'username@your_domain.com.'
7. Enter 'imap.gmail.com' as the incoming mail server and select 'Next.'
8. Enter 'smtp.gmail.com' as the outgoing mail server and select 'Next.'
9. Select the appropriate access point and then 'Next.'
10. Enter a descriptive name for the email account mailbox name.
11. Once your mailbox is set up, select it from the email mailbox settings screen.
12. Select 'Connection settings' > 'Incoming e-mail.'
13. Enter your address (including '@gmail.com' or '@your_domain.com') and password.
14. Select 'SSL/TLS' for your security (ports) and define your port as '993.'
15. Select 'Back.'
16. Select 'Outgoing e-mail.'
17. Enter your email address (including '@gmail.com' or '@your_domain.com') and password.
18. Select 'StartTLS' for your security (ports) and define your port as '587.'
19. Select 'Back' and change any other settings according to your preferences.
That's just for getting it set up. Once it's all set up you can configure some of your own settings. For instance under Automatic Retrievel I set it for 15 minutes and I can close my email inbox yet it stays connected and pushes new mail through just as it arrives in my real inbox. If for some reason the data connection is broken it will automatically reconnect after 15 minutes. All emails are synced perfectly with your real inbox almost instantly. If you want to delete something from your phone you can but if you choose "phone and server" it will simply archive it in Gmail, which is actually quite handy I think.
Are any of you using this as your email solution? Please leave your comments.
2 comments:
I'm having problems getting this to work. I've done everything listed and when I try to connect to my email it just times out. I have no idea what I can do.
I might try changing the email to pop3, but I have no clue how to change it in the E71. It only lets me select IMAP4.
Brad Pritchard
bradrpritchard@gmail.com
Hi Brad! You might want to see the retailer who sold you the phone or the worse, reset your phone (backup all your phone data and check with the expert before you do it!
Post a Comment